
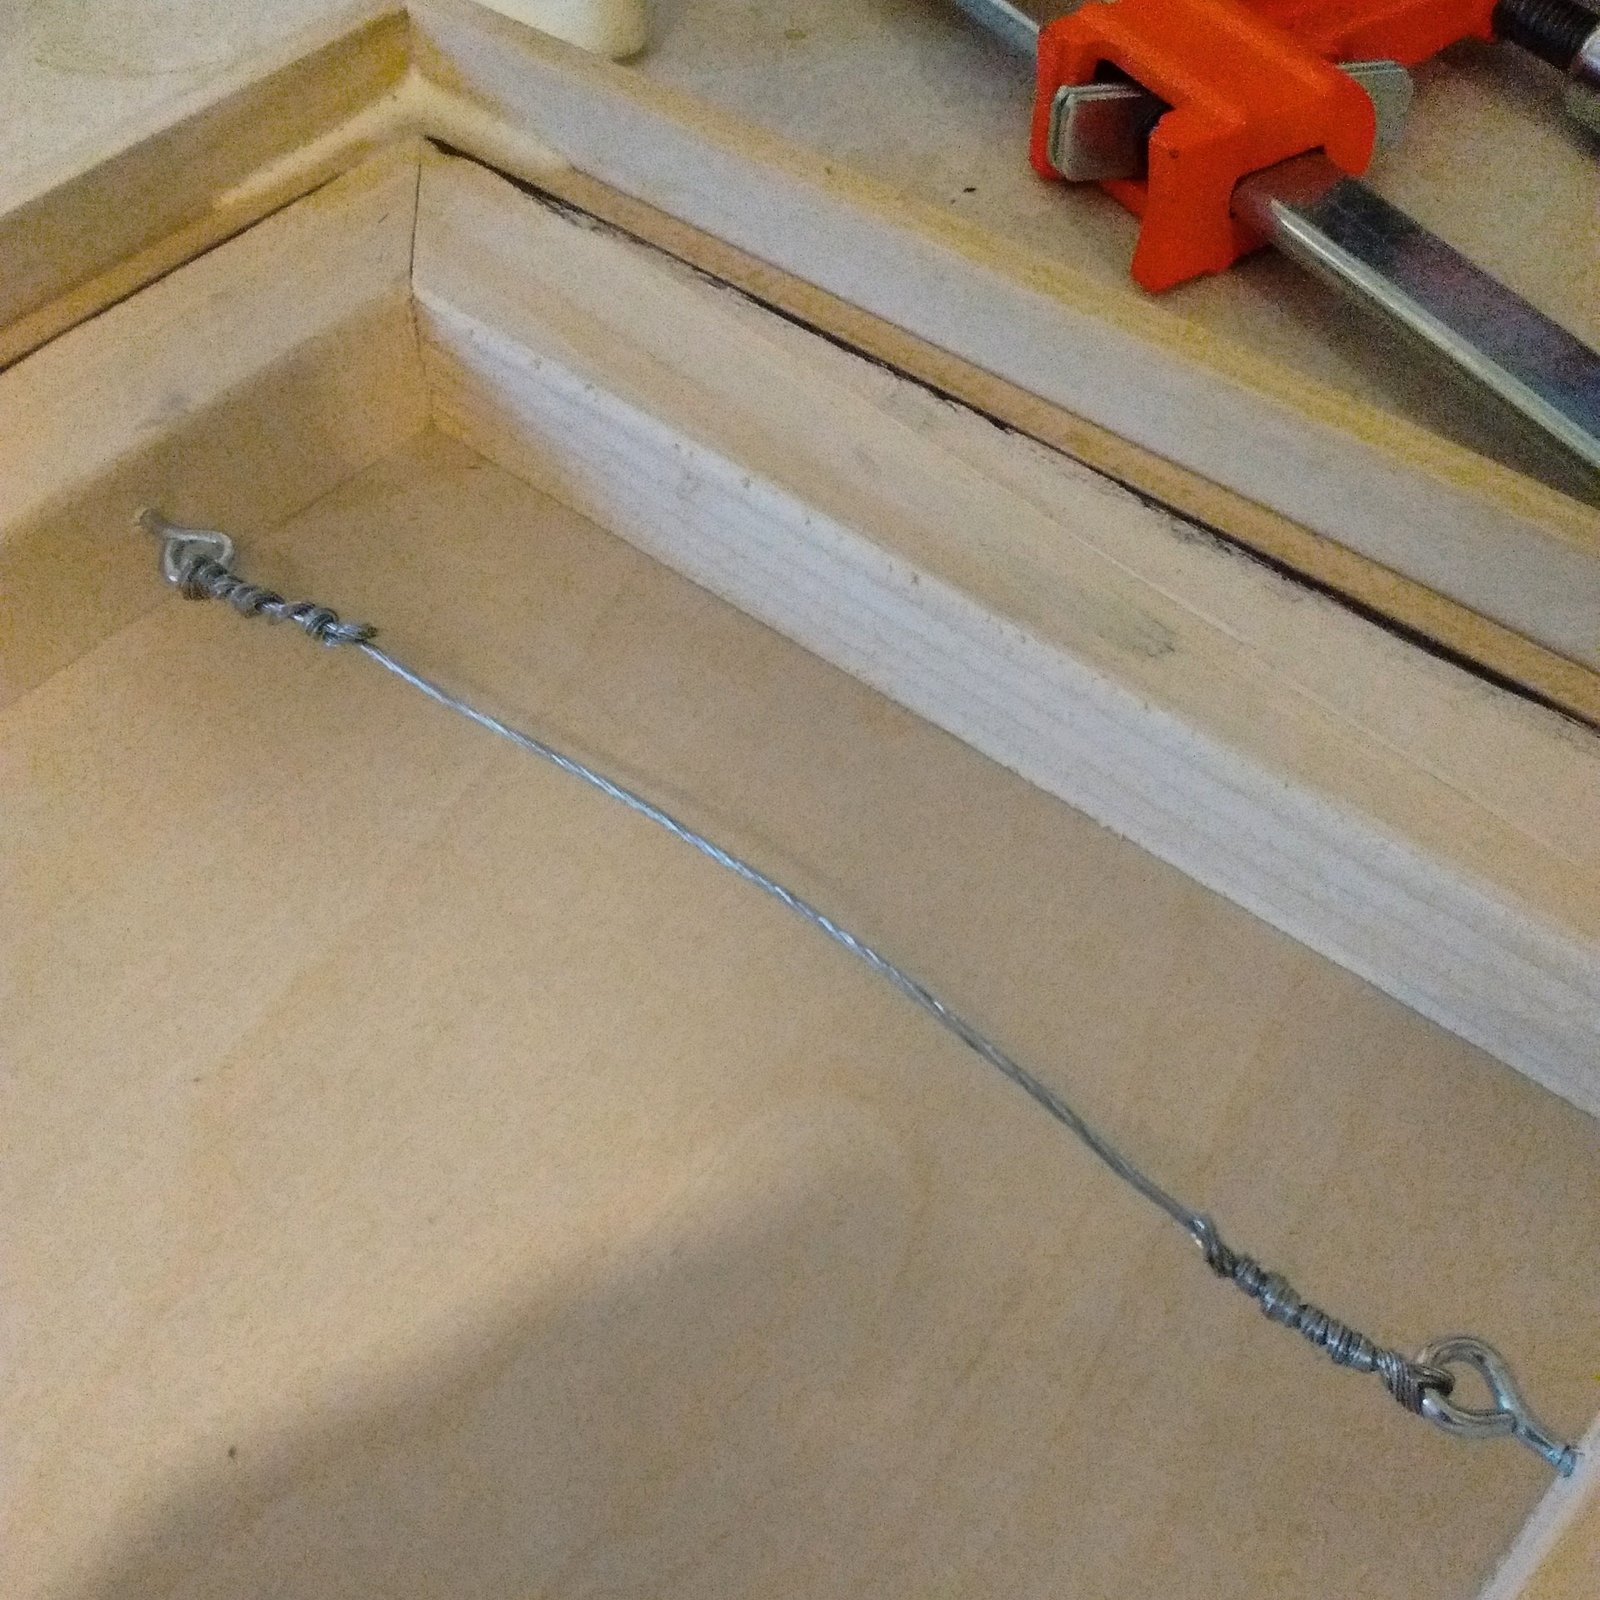
Can you spot the problem? (see the bottom for the answer)
The goals of wiring a painting properly are that:
- the painting is securely and safely hung, and
- that the viewer cannot see the wire.
Materials:
- Wire. Make sure it is the proper size for the weight of the artwork. Use wire that is meant to hang artwork. This wire is braided and often called “framers wire.” On the package it will tell you how much weight the wire can hold.
- Wire cutters. I have used a variety of wire cutters over the years. Go with whatever works best for you.
- Small eye screws, or wire strap hangers. Wire strap hangers are great when attaching the wire to the back. Small eye screws work well for attaching to inside of the frame.
- Optional: Needle nose pliers. If you wire is too heavy duty, sometimes a bit of help is nice.
Steps to attach the wire:
- Turn the artwork over. Make sure it is on a surface that is clean and won’t scratch the artwork if it gets jostled.
- Choose the location for your hanging hardware. It needs to be about 1/3 down from the top. If it is too high you won’t have the space you need to hang and not have the wire come above the top edge. If too low the balance will be off and the top can kick off the wall instead of hanging snuggly against the wall.
- Attach the two hangers or eye screws.
- Measure the length of wire that you need. The easiest way I have found to do this is to put one end through the hanger loop. Leave yourself about 2-3 inches of excess wire. Then loosely stretch the wire over to the other hanging loop. Give yourself the same amount of excess wire at the end. Make sure you have enough wire to allow a little slack. If unsure, longer is better. If you cut it too short you’ll need a whole new piece of wire.
- On each end you will loop the wire through once, leaving the 2-3 inches mentioned previously. Then wrap the excess wire (the short piece) around the longer piece. Neatly spiral the short-wire around the long-wire. This should be a nice neat wrap. If there are any bits sticking out, use pliers to make them smooth with the other wire. You don’t want to have someone prick their finger on your wire!
- Once both sides of the wire are attached check your work. Make sure your wire will support the weight of the artwork. I simply hold the art up by the wire and make sure the wire doesn’t start to slip. Then I hang it on the wall and check that it was easy to hang up and that the wire doesn’t show. Please!!! Double check how it hangs on the wall. Many times I have dealt with a painting that is nearly impossible to hang because the wire is too short. This does not give me warm fuzzy feelings about the artist while I struggle. I need to be able to hold the wire and find the hook or nail. If your wire is too taught, my arm will not fit between the work and the wall. Then starts the awkward hanging dance. Not good.
Extra tips:
- Wire too tight: Makes it difficult to put the wire onto whatever hook, nail or the like you have in the wall. You may need more wire, or you can try the fork trick. Put a fork, tines down, over the nail in the wall, with the curve of the fork against the wall. Now slide the wire between the wall and the fork. Once the wire is onto the nail, remove the fork.
- Wire too loose: You need to have your wire not position the nail against your painting frame. If you wire is too long this can happen, or even show your nail above the frame. To fix this problem shorten the wire.
Answer to the photo question:
Here, I made the simple mistake of having too short of a wire. Although it was long enough to stretch across the work, it isn’t long enough to attach to the wall because the frame is a bit deeper than the wire will allow. To fix it I had to remove the wire and use one that is two inches longer to provide the slack I needed.